Creating Your Signup Form
- Go to Add Items > SignUp Form
- You can Expand or Hide additional options by clicking the Arrow to the left of each section's header
- In the Form Properties section, the Header Text is the title of the SignUp Form (ie. Sign Up Here for...)
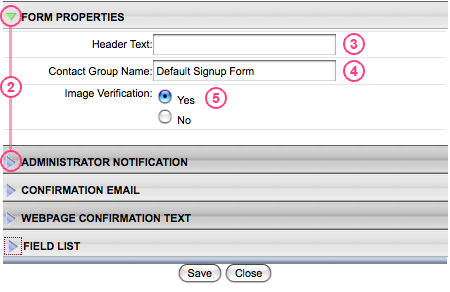
- The Contact Group Name is the contact group that the registrants will be stored under in the database when they sign up. If you name the group XYZ, then when people sign up you can go to Site Management > Contact Management > View/Edit Contact Data and click on group XYZ to see who has signed up.
- Enable Image Verification.
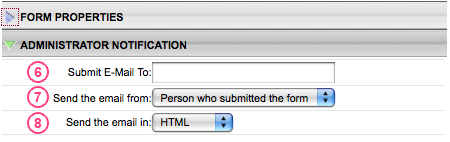
(Click Here for more info) - Submit Email To is the email address of the Administrator of this event / group. When someone signs up, it sends the Administrator an email saying who signed up and all their info.
- Send the Email From determines where the Administrator's email comes from. Either the person who submitted the form, or The address above, which is the Administrator.
- Send Email In gives you the option to receive their info in plain text (Name: Person's Name) or in HTML (which puts the form in a table/spreadsheet.)
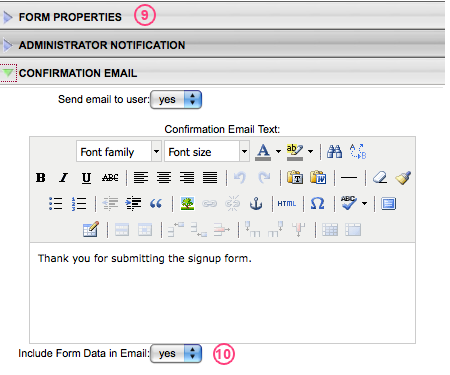
- Confirmation Email will send an email to the person signing up. Change it to No if you do not want an email to be sent. *NOTE - You must use the original email field for this feature to work. Simply creating a new field called Email will not work.
- Include Form Data in Email will include the filled out SignUp Form in the Confirmation Email.
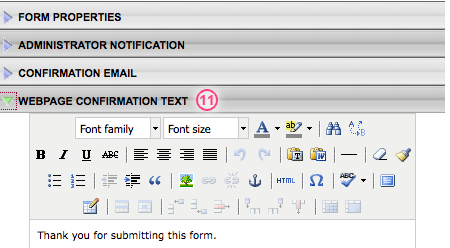
- Webpage Confirmation Text is what shows on the webpage in place of the SignUp Form when it has been submitted to confirm that it was accepted. (ie. Thank you for signing up).
The Field List is where you determine what fields the person has to fill out. Click Here to learn more.
