Final Cut Export
Final Cut is a video editing program that is used to edit and export high quality source files. Final Cut is NOT a video compression software. Exporting as a Quicktime Movie generates a large, highest, unhindered movie file which can then be converted/compressed through Compressor. You can compress your file from the program by selecting Export Using Compressor, but it will run through the other programs and will not generate your uncompressed source file.
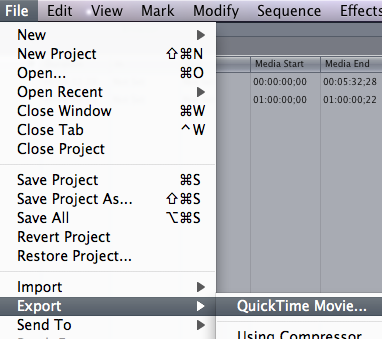
To Export your uncompressed source video file from Final Cut, click in your timeline to make sure you are exporting your final edited version then go to file and select Export > Quicktime Movie.
Then Just select your destination of where you want your video to go. You can then take that source file and create a compressed version using a compression program.
Compressor
Compressor is the compression software that comes packaged with Final Cut Studio. It is an advanced program with many compression settings and options. It can be pretty daunting look at but this will help you in navigating your way to convert your video to our web standards.
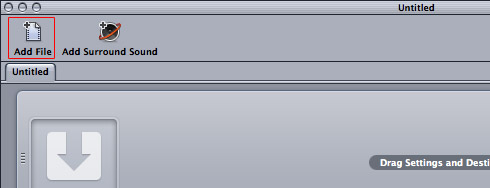
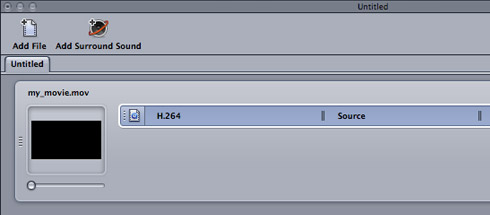
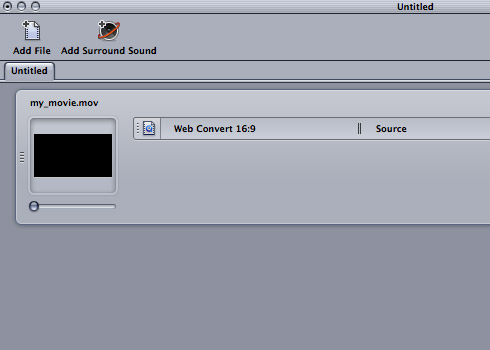
First, open Compressor and click on Add File in the upper left corner to select your uncompressed source video.
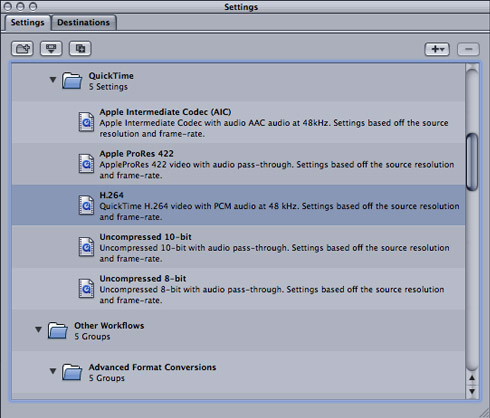
Next go down to your settings panel and scroll until you see the H.264 preset option in the folder structure Apple > Formats > Quicktime > H.264. Click to select the preset and drag it to your video in the panel above.
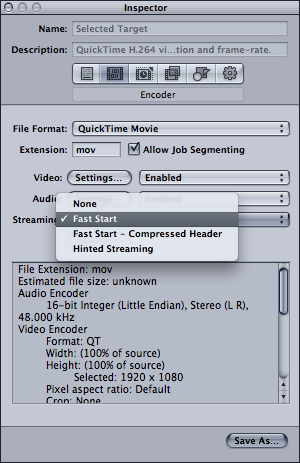
With the setting selected in the top panel, go to the panel below called inspector. Here is where we will modify this preset to follow our standards for web video. The panel initially shows the Name of the preset, a desc ription of the preset and has some small buttons/tabs that can be toggled to change certain settings. Click on the second button/tab in this list, the Encoder.
From here, change Streaming to be "Fast Start." This will allow the video to be downloaded while it is playing for extremely faster wait time on the user's side.
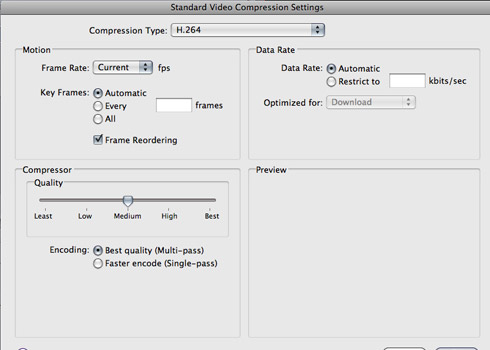
Next, click the Settings button next to Video. This will pull up an administration window similar to the one for Quicktime Pro.

Change the Keyframes to be Automatic and the quality to be Medium.
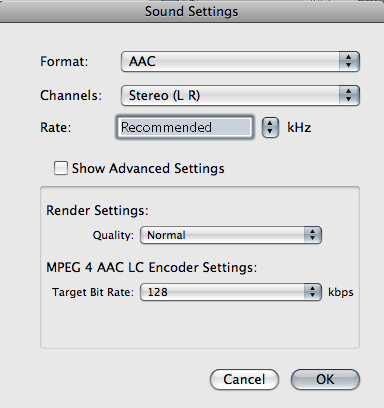
Now, click on the Settings button next to Audio. The default audio settings will cause for a massive increase in file size so they need to be adjusted.
Change the format to be AAC and the rate to be Recommended. Then click OK.
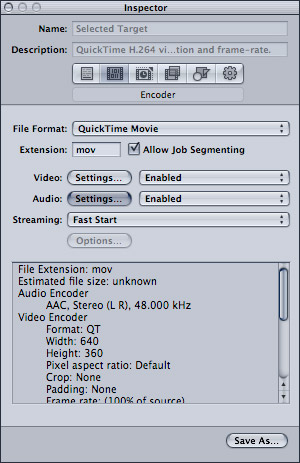
Next, Click on the Geometry button/tab in the top list go change the size and aspect of the video. Select a custom size and aspect ratio from the list according to your source video file.
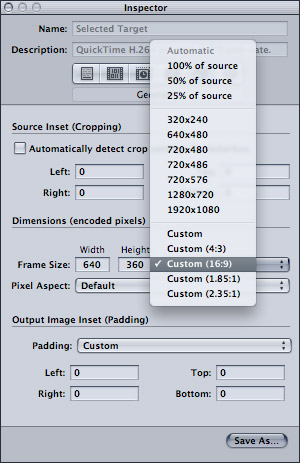
Then type in your frame size according to our standards 640 x 360 for 16:9 aspect, or 480 x 360 for 4:3 aspect.
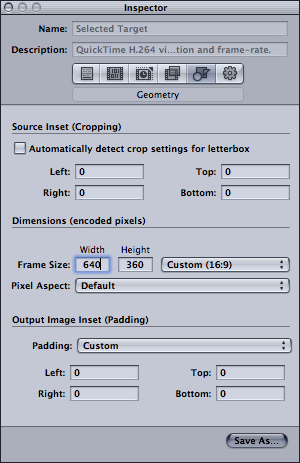
Now go down to the bottom of this panel and click Save As and name this custom setting.
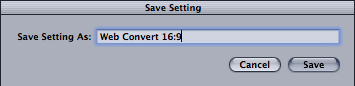
After clicking save the new setting will go down in your Settings panel under the Custom folder. Now select your custom setting and drag it and release it on top of your video in the panel above. You can then delete the old H.264 preset with the old settings we do not want by clicking the minus button on the right of the preset.
Click submit to start the conversion. The new compressed version of the video should save to the same destination as your source video.
subpages
- Advanced Security
- Anchors
- Blogging
- Calendar
- Contact Management
- Domain Transfers
- E-commerce
- Email Marketing
- Embedding Videos
- Event Box
- Flash Event Box
- Flash Photo Gallery
- File Box
- Forms
- Go Live
- Image Manager
- Image Verification
- Multimedia Box
- Page Layout/Properties
- Pages
- Podcasting
- SEO Basics
- Sorting Content
- Social Media
- Sub Page Box
- Troubleshooting
- Website statistics
- WYSIWYG FAQs
- Video Standards
- Walkthrough
