Advanced Security
This page will introduce you to the Advanced Security feature. Advanced Security allows you to set access privileges to specific pages on your site. If you have a volunteer that you want to help maintain the website but do not want to give them the ability to edit every page, then this feature is for you. Simply follow the steps below to add an administrator to your site with limited access.
Creating a New Administrator
If the administrator already exists and you just need to limit their page access, skip to Limiting Administrator Access. Otherwise, you will need to create a new administrator.
To create a new administrator you can follow these steps:
- Click on Site Management.
- Click on Advanced Security.
- Click on Add New User.
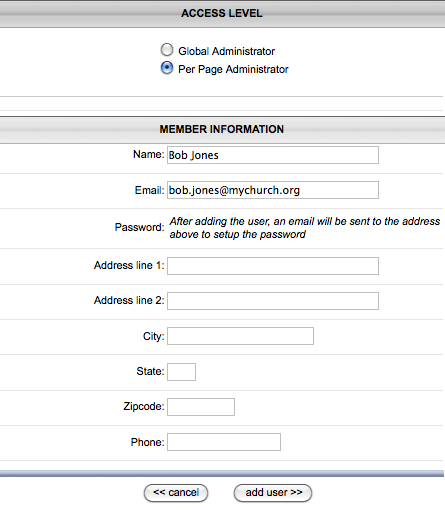
- Choose Per Page Administrator to limit their access to particular pages. If they need access to edit every page, choose Global Administrator and skip the section titled Limiting Administrator Access.
- Enter the Name.
- Enter the Email Address.
- Enter other contact information if you prefer. These fields are optional.
- Click on Add User.
An email will be sent to the email address entered in order to complete their account. Their account does NOT have to be completed before moving to the next step to limit administrator access.
Limiting Administrator Access
Now that you have added the new administrator, you can limit their access to certain pages. Please note that this only applies to Per Page Administrators, not Global Administrators.
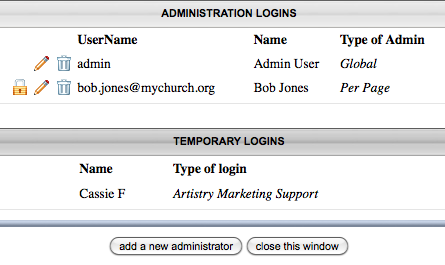
You can view the Access List by following these steps:
- Click on Site Management.
- Click on Advanced Security.
- Click on the lock icon beside the administrator you need to edit.
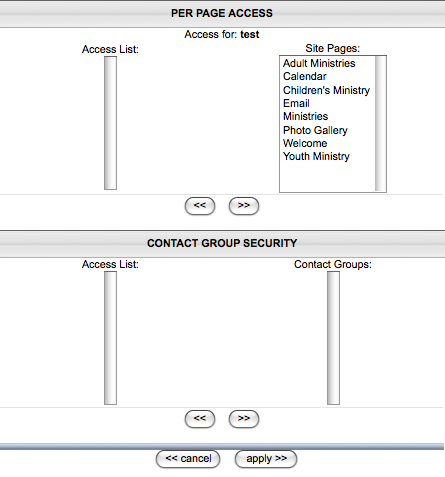
This window is where you will set the pages that the administrator is allowed to edit on the site. On the left is the Access List which are the pages that the administrator is allowed to edit. On the right are all of the pages that are on your site. To give access to a page, simply click on the page in the right column and then use the arrows down below to move it to the left column.
After you have given access to all of the pages that they need access to, click on Apply. When the administrator logs in to the site it will only show them the editing options on pages that they are allowed to edit. If they are on another page, it will simply appear as a normal page with no editing options.
subpages
- Advanced Security
- Anchors
- Blogging
- Calendar
- Contact Management
- Domain Transfers
- E-commerce
- Email Marketing
- Embedding Videos
- Event Box
- Flash Event Box
- Flash Photo Gallery
- File Box
- Forms
- Go Live
- Image Manager
- Image Verification
- Multimedia Box
- Page Layout/Properties
- Pages
- Podcasting
- SEO Basics
- Sorting Content
- Social Media
- Sub Page Box
- Troubleshooting
- Website statistics
- WYSIWYG FAQs
- Video Standards
- Walkthrough
